Creating Menu Item; Step 2;- Add Sizes
Now that we have Salad as a menu item, we can add different sizes of salads to our menu item.
You may ask, 'Why do I need different sizes?' Maybe your customers have mentioned that the salad you offer is too big, or they would like to see a "lunch" size salad on your menu. Then you would want to offer different Size portions; such as Small and Large, Half and Whole; Lunch and Regular, etc.

Adding Sizes
To edit a food item, you need to be in the Edit Food Items screen. If you're not already on that screen, you can get there by selecting Menu Setup from the top bar of the home screen.
Then go to Food Items and choose Edit Food Items.
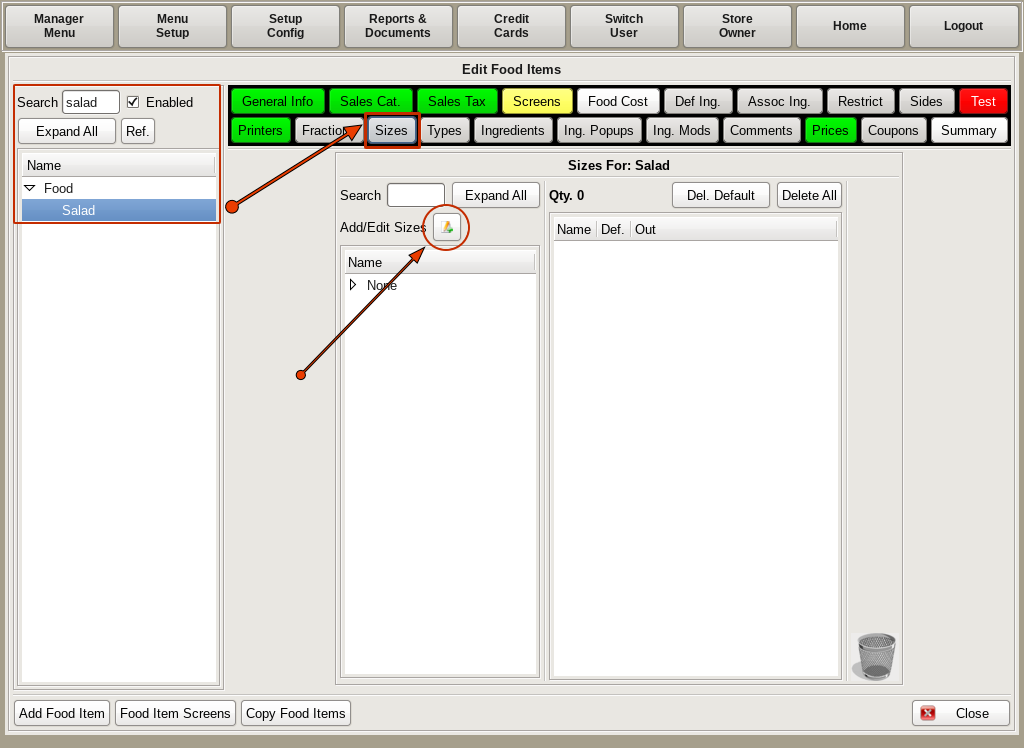
Start by searching for and selecting Salad from the list on the left.
Then click the Sizes tab, and click the Add/Edit Sizes button.
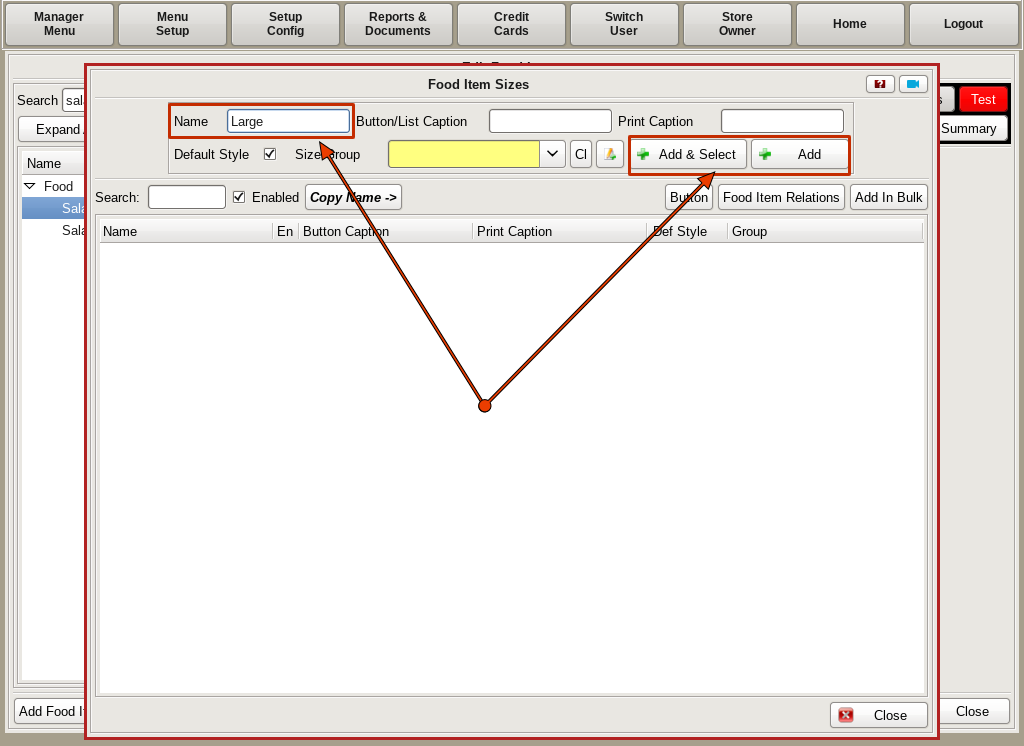
This will open up the Food Item Sizes window.
Enter the name of the size in the Name field, such as Large, Small, etc.
You will see two buttons on the right; Add & Select and Add.
Add & Select will add the items to both the POS and to the food item you are editing.
Add will only add it to the POS.
In this instance, we will choose the Add & Select button so that it adds the Sizes to the Salad.
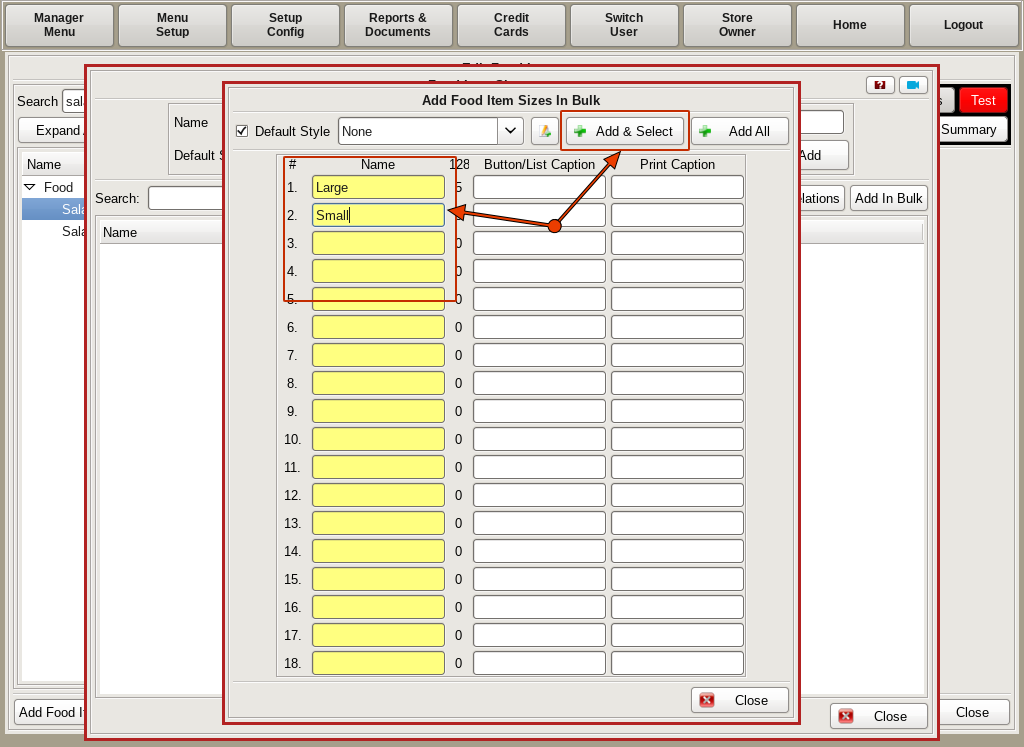
If you have multiple sizes you need to enter, you can click the Add in Bulk button. A new window will open up with multiple Name fields. You have the same Add & Select and Add buttons here as well.
Once you've entered the sizes, click Close.
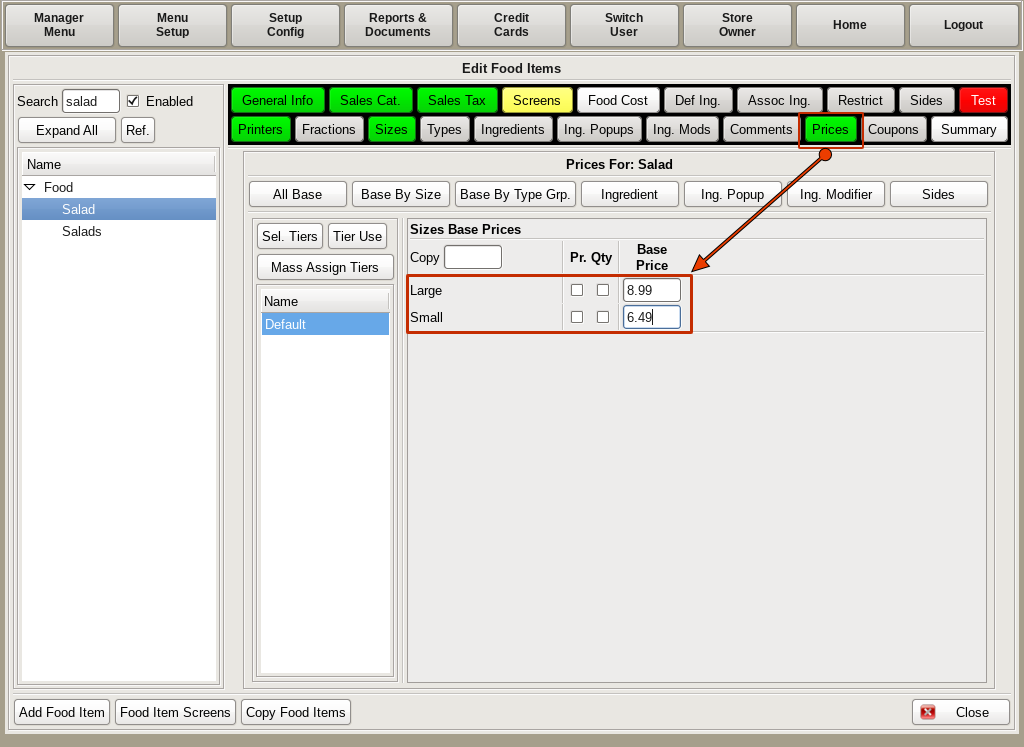
Now that we have different sizes, we need to Price the different sizes.
Click the Price tab, and under Base Price you will see fields for each size. Fill in the prices for each one.
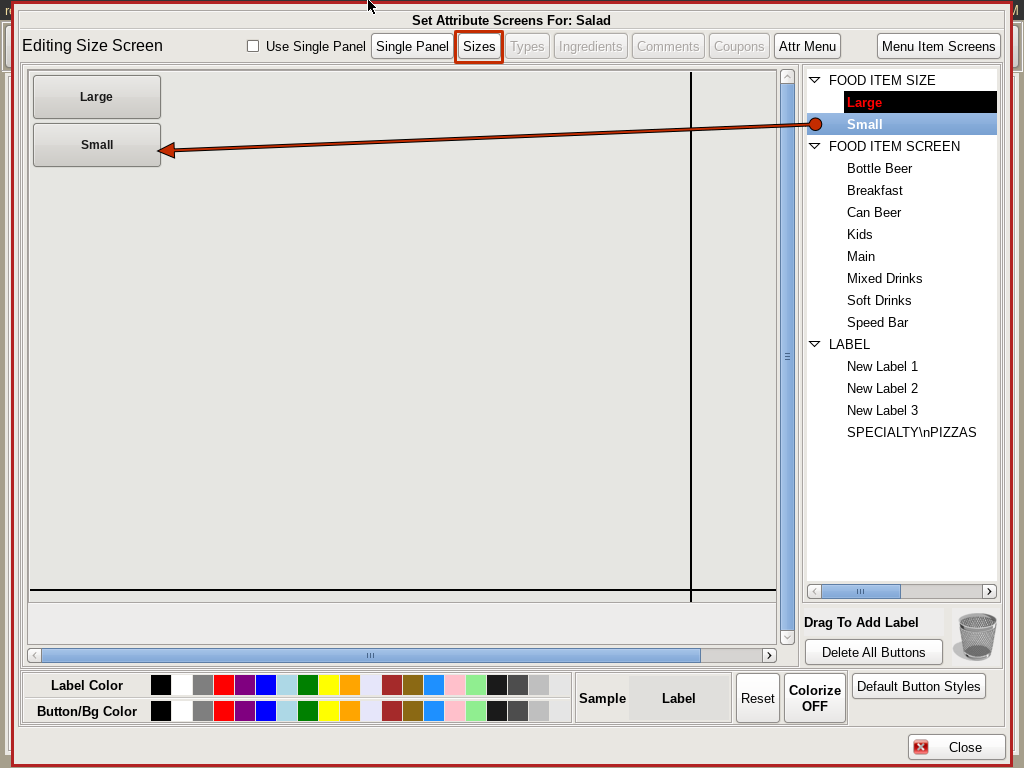
Now we need to create a menu button for the sizes.
Click on the Screens tab to open the Food Screen.
Click on the Sizes tab and search for the sizes on the right. Drag and drop the sizes to the grid where you want the buttons.
Close out all screens back to the home screen.
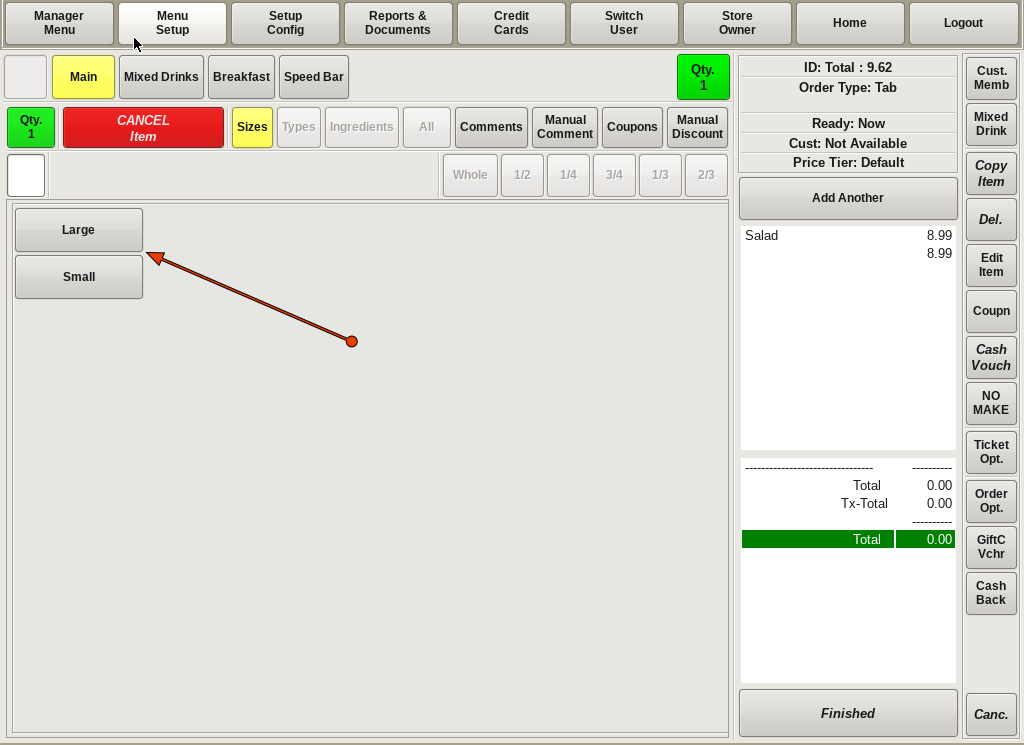
Now, when you start a new order, after you click the Salad button, you will see the Size buttons.
Choose the correct size for your order, and you will see Salad and the size on your ticket.